
This post may contain affiliate links. See our affiliate disclaimer here.
RVs that sit in storage during the winter tend to have the same problems when they come back out. Understanding these common post-storage problems will help you diagnose the issues and repair your RV before your first camping trip.
Keep reading to learn about the 5 most common post-storage RV issues, how to identify them, and how to fix them.
This post is sponsored by etrailer.com. They’re my go‑to for RV replacement parts. I’ve been ordering from them for years and always get great customer service. I especially love their detailed product descriptions and video tutorials. They make it easy to get the right part on the first try.
Contents
Dead or Weak RV Battery After Storage
How to Identify the Problem
If you are having issues working basic features, such as the lights or your electric jack, your RV battery is likely dead or weak.
First, confirm the battery disconnect switch is on. Many RVs disconnect the battery for winter storage, so double-check if the disconnect or kill switch is switched off before doing anything else.
How to Fix It
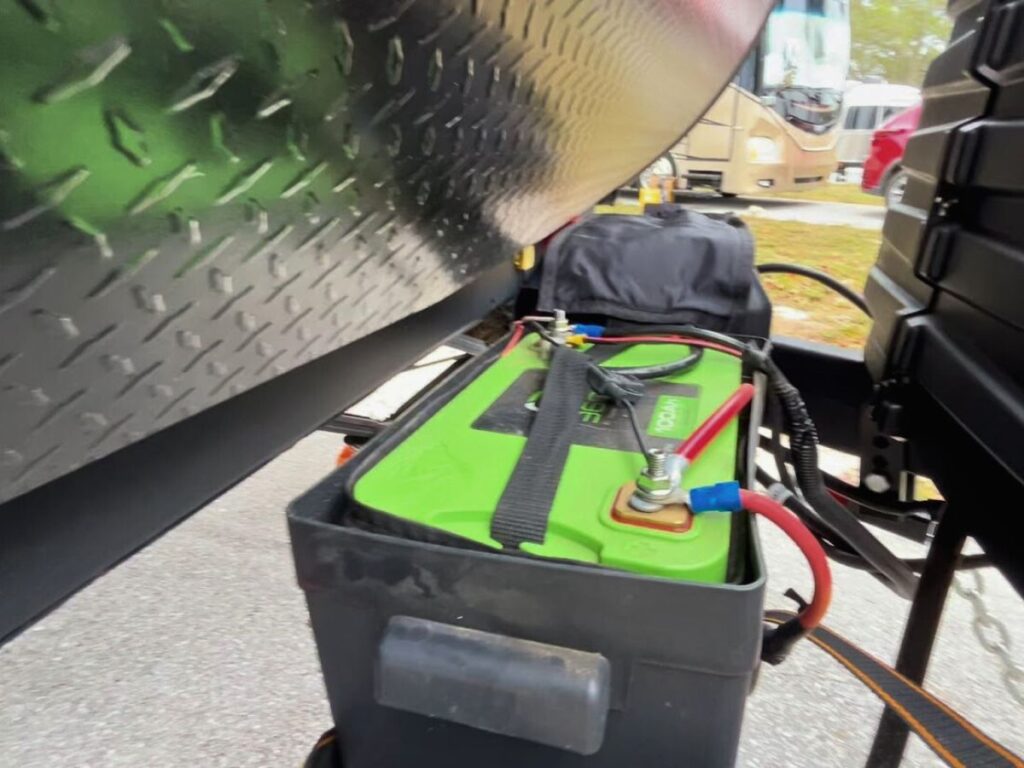
First, you need to determine if the battery is dead or failed. Try charging the battery, either using a battery charger or by connecting the battery to your tow vehicle. If the battery is just dead, it will charge. A failed battery will not hold a charge.
Next, you are going to want to order a new battery. If you have a lead-acid battery, you probably want to replace it even if it has not completely failed. Once lead-acid batteries die, their capacity is permanently reduced, which means your battery will die more quickly on your next trip.
When buying a new battery, consider upgrading to a LiFePO4 battery. These deep-cycle lithium batteries provide efficient, long-lasting power for your RV. When we upgraded from a typical lead-acid RV battery to two 100 Amp Hour LiFePO4 batteries, we more than tripled the amount of time we could camp off-grid without draining our battery.
If you need a new battery, you can shop a variety of options on etrailer.com. Their detailed product information and installation videos will help you select the best option.
To prevent this in the future, store batteries fully charged and disconnected, or keep them on a maintainer during storage.
Cracked or Dry-Rotted RV Tires
How to Identify the Problem
When pulling your RV out of storage, you should always check and adjust the tire pressure before moving the RV. We travel with a portable 12v tire inflator, so we can adjust the pressure without having to drive anywhere.
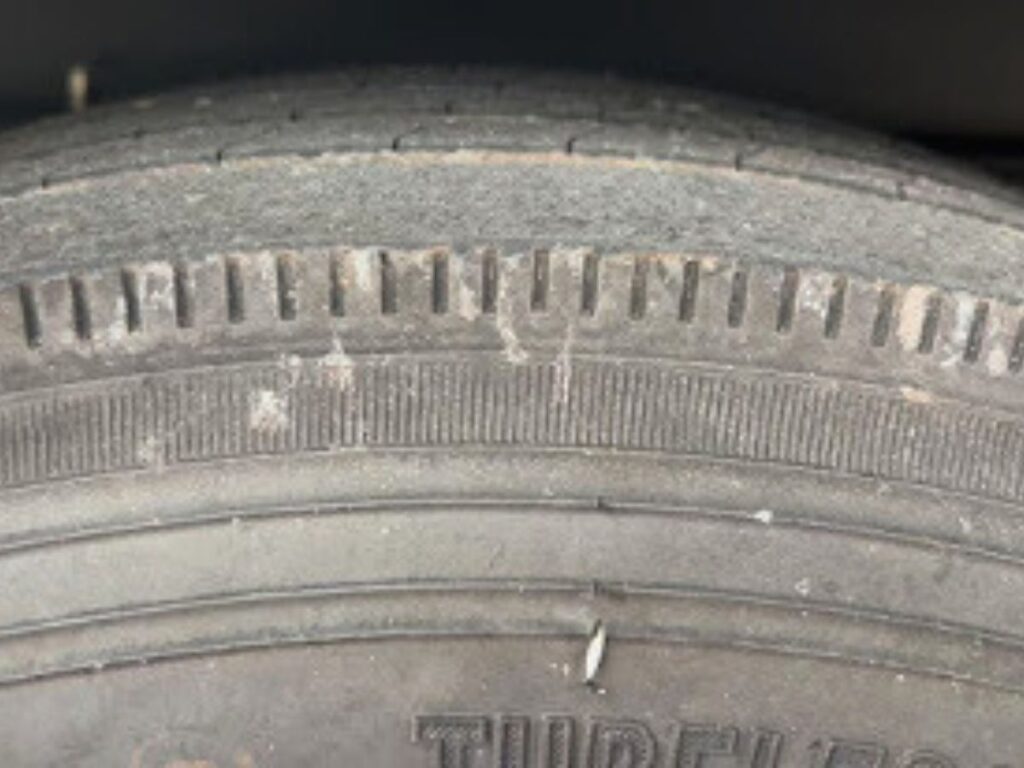
However, just checking the pressure isn’t sufficient to know that your RV tires are safe. Visually inspect tire sidewalls closely. Look for cracking, bulges, or dry rot. Tires can hold air and still be unsafe.
Also, go ahead and check the DOT date on your tires. With RV tires, age matters more than mileage. Travel trailer tires need to be replaced every 3 to 5 years, and motorhome tires need to be replaced every 5 to 7 years. Many RV tires age out before they wear out.
How to Fix It
If cracks are visible or the tires are past their recommended service life, replace them. Do not tow or drive with visibly cracked tires. etrailer has a large selection of travel trailer tires.
To reduce damage during storage next year, use tire covers and maintain proper inflation.
Bad Odors Inside the RV

How to Identify the Problem
Well, this one is pretty straightforward. If your RV stinks when you walk inside it for the first time, you have an issue.
Odors after storage are usually caused by one of the following issues:
- Dried plumbing traps
- Dtagnant air
- Holding tank gases and build-up
If the smell appears immediately when opening the RV, start with the plumbing.
How to Fix It
First, vent the RV by opening windows and roof vents. Put out some odor eliminators to help neutralize the smells.
Then, run water in all sinks and showers to refill traps. Fill the holding tanks with water and dump repeatedly to flush any hardened waste out. If you still have a smelly black tank after flushing, consider using a reverse flush valve or a black tank rinser for a more effective cleaning.
Finally, use a black tank treatment, like Camp Champ, that eliminates odor-causing bacteria instead of just covering the smell up.
Cracked or Leaking RV Toilet Seal
How to Identify the Problem
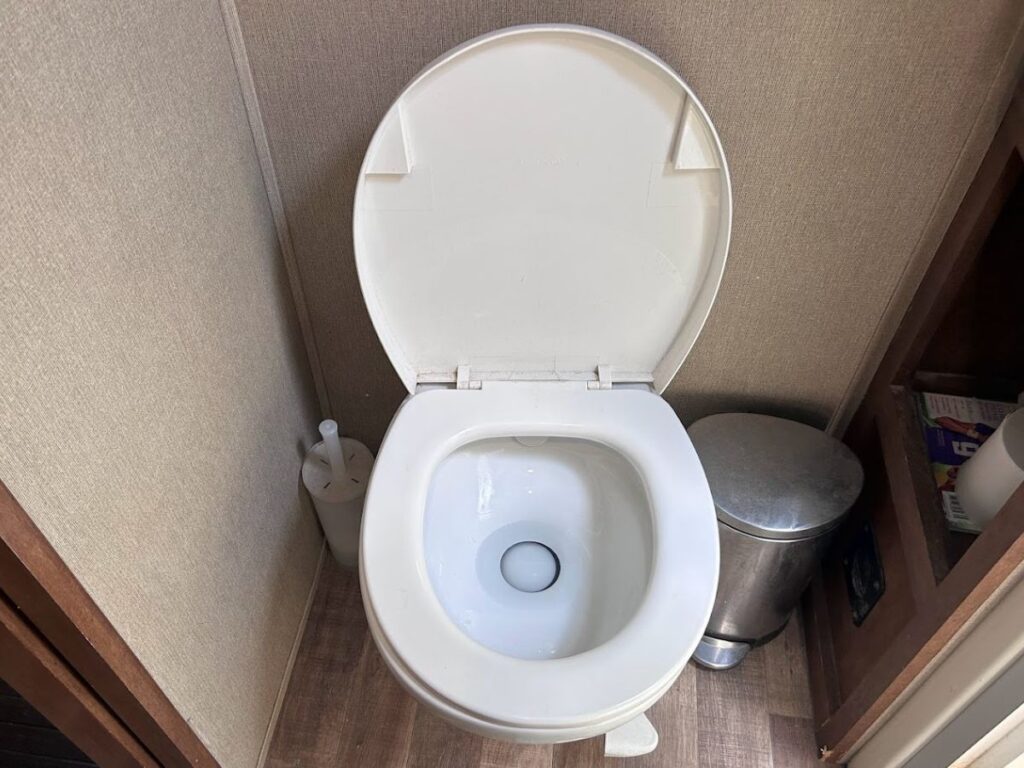
One of the most common post-storage issues in RVs is a dried-out toilet seal. You know you have a dried out seal if the toilet bowl no longer holds water. A dried out seal may also contribute to the odors we discussed in the last section, as odors can seep up out of the black tank through the toilet.
A properly functioning RV toilet seal keeps water in the bowl and blocks odors from the black tank. When an RV sits unused for months, this rubber seal can dry out and crack.
How to Fix It
Start by cleaning and lubricating the seal. Sometimes a dried seal just needs to be cleaned and reconditioned to work again. Use an RV-safe toilet seal lubricant and avoid household cleaners that can damage rubber.
If the seal is visibly cracked or still leaking after lubrication, it will need to be replaced. Fortunately, RV toilet seals are inexpensive and relatively easy to install with basic tools. Just order one from etrailer and follow the installation instructions on the product page.
RV Water Pump Not Working After Storage
How to Identify the Problem
Water pump issues are also common after winter storage, especially if your RV was winterized.
Water pump issues that commonly occur include:
- The water pump runs, but no water comes out
- The pump won’t turn on at all
- The pump cycles on and off repeatedly
- The pump is unusually loud
These issues are often caused by air trapped in the lines, a clogged inlet strainer, or a pump that was damaged by freezing.
How to Fix It
First, try re-priming the water pump. Fill the fresh tank, turn on a faucet, and let the pump run steadily until water begins flowing. This can take a few minutes if air is trapped in the system.
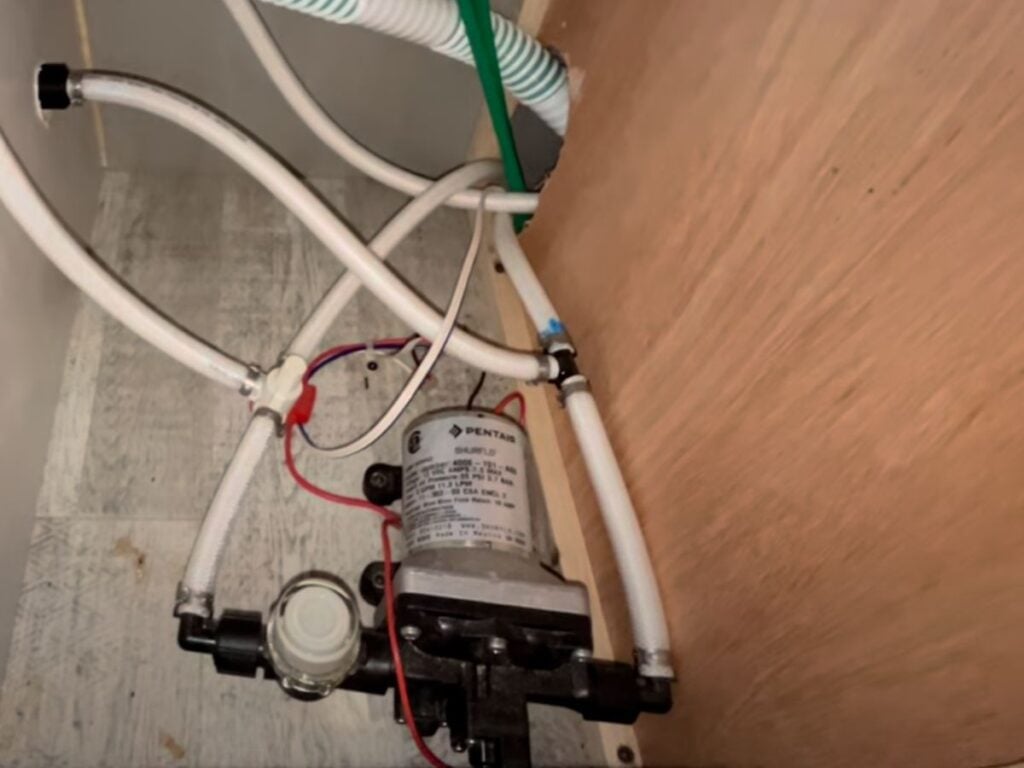
If priming doesn’t fix the issue, check the pump’s inlet strainer. First, find your water pump, which is often located inside a cabinet. You can usually turn it on and follow the noise to find it.
On the incoming water line, you will see a small, clear or white plastic filter. This is the inlet strainer. Turn the pump off, unscrew the strainer by hand, and check for debris, sediment, or leftover antifreeze. Rinse it out with clean water and reinstall it snugly (hand-tight only).
If the pump still won’t work properly, inspect the water lines for leaks or loose fittings. A pump that was exposed to freezing temperatures may be cracked internally and require replacement.
If you need parts or a replacement pump, etrailer offers a wide selection along with installation videos to help you tackle the repair confidently.
Most post-storage RV problems aren’t random. Dead batteries, aging tires, odors, dried seals, and water pump issues are all predictable when an RV sits unused for months. The good news is that most of these issues are easy to identify and fix before your first trip of the season.
Taking a little time to walk through your RV, check these problem areas, and make simple repairs can save you from dealing with breakdowns, smells, or safety issues at the campground.
When you’re done de-winterizing, it’s also worth thinking ahead to next year. Storing your RV properly can prevent many of these problems from happening again. Bookmark our complete guide on how to winterize your RV so you can prevent storage issues next year.
Happy Camping!
Christina Pate is a seasoned full-time RVer who, along with her husband Justin, has journeyed across the US, Canada, and Mexico. Drawing from her extensive travels, RV repairs and RV renovations, she founded Travels with Ted to guide and inspire fellow RV enthusiasts. Christina is also the co-author of The Owner’s Guide to RV Maintenance and the creator of My RV Log Book.