This post may contain affiliate links. See our affiliate disclaimer here.
After spending years viewing all of the beautiful RV bedroom remodels on social media, I was ready to update our ugly, brown bedroom. I had held off for years because I have never been particularly handy or crafty.
However, once I dove into the RV renovation process, I found easy and affordable ways to update our space. Below are 5 easy DIY RV bedroom remodel ideas that any camper can execute in a few days.
Contents
Paint the Walls
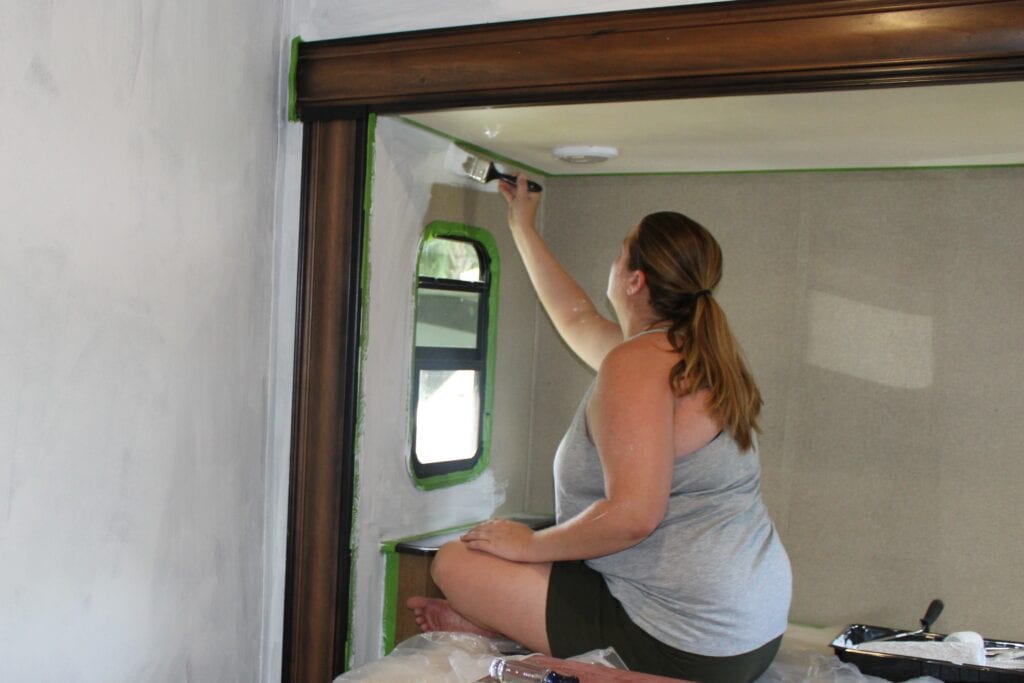
Painting the walls is the most impactful change in an RV bedroom remodel. Your room will look instantly better once the hideous RV wallpaper is covered.
I was nervous about painting the RV walls after hearing others describe it as a painful process. However, I was pleasantly surprised that with a little prep work, I was able to efficiently paint our bedroom in just two days.
Materials:
- Drop Cloths
- Sandpaper
- Painter’s Tape
- Brushes and Rollers (make sure to have some small brushes for tight RV spaces)
- Paint Trays
- Bonding Primer
- Paint
- Optional: Paint Sprayer (If you plan to paint your entire RV, it may be worthwhile to invest in a paint sprayer.)
Process:
Start your RV bedroom remodel by removing the mattress, window coverings, and any other large items you do not want to paint around. Next, clean the walls thoroughly with TSP or a water and vinegar solution.
Tape edges, corners, and switches, and use drop cloths to cover the floors and furniture. Putty any holes from window treatments or pictures that you do not plan to re-hang.
Then, lightly sand the walls, which will help the primer stick, and use a damp cloth to remove any residue from sanding.
Once the walls are dry, you are ready to start painting. Always use two coats of the bonding primer and two coats of paint for the best result.
For instructions on painting the dresser or over-the-bed cabinets, see our guide to painting RV cabinets. If painting walls and cabinets sounds like too much work, consider purchasing one of these RVs that come from the factory with a bright, modern interior.
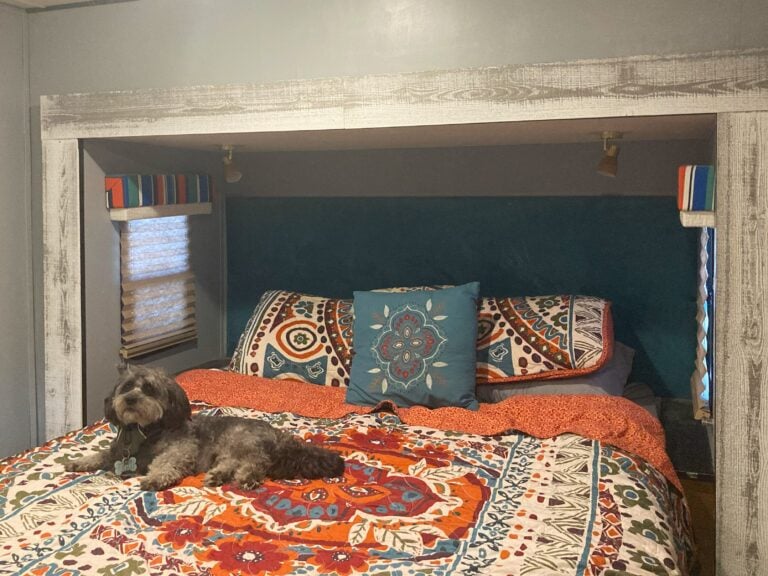
Recover the Headboard
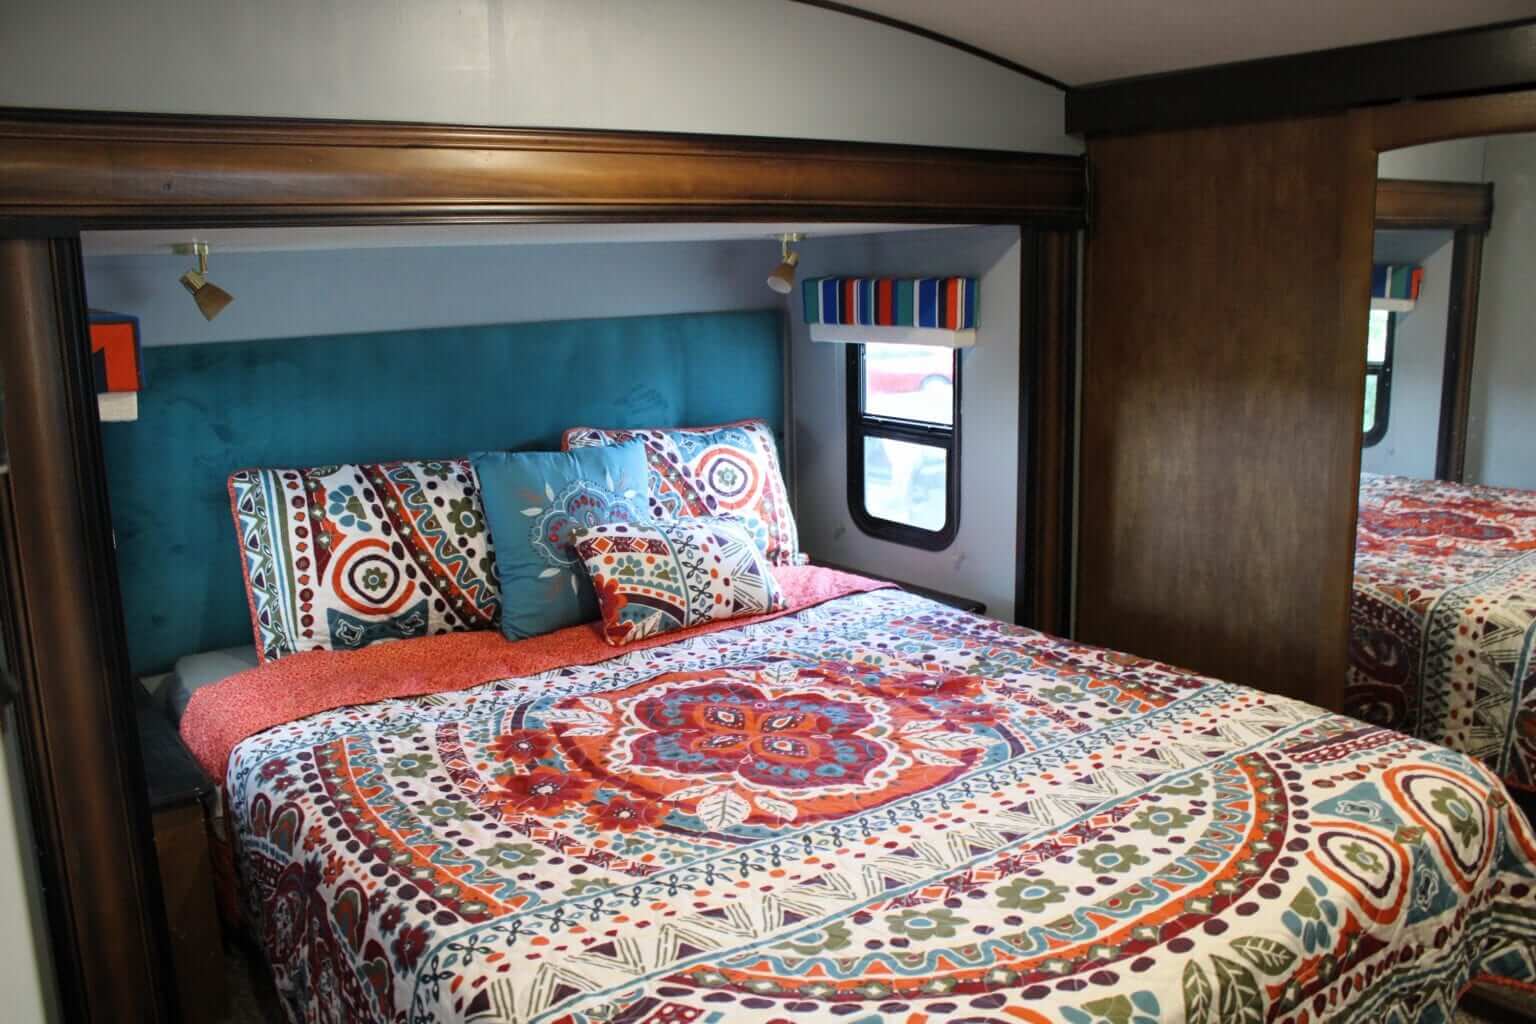
Since most rigs come with a headboard covered in ugly RV fabric, recovering the headboard is a must for any RV bedroom remodel.
I had originally planned to purchase a new headboard, but decided to give recovering a chance to save money. The headboard turned out to be one of the easiest projects of our bedroom remodel.
Materials:
- Fabric of your choice
- Clamps
- Staple gun
Process:
Remove the headboard from the wall, and save any screws you will need to re-install. Leave the original fabric on the headboard so it holds its shape. Place the fabric under the headboard and cut so you have 6 or more inches extra on each side.
Pull the fabric taught on one side of the headboard and clamp it into place. Then, use the staple gun to attach the fabric to the headboard. Continue clamping and stapling in small sections around the headboard until it is completely covered.
Our headboard had buttons covering the screws used to attach it to the wall. We were not able to successfully recover the buttons, so we ordered new snap-on buttons from Etsy to replace the originals.
Alternate Idea: If your RV doesn’t have a headboard, consider installing peel-and-stick wallpaper behind the bed to create a feature wall.
Recover Window Valances
Like the headboards, RV window treatments typically are not covered in fashionable fabrics. Removing or recovering these outdated window boxes is a great way to make your RV master bedroom more fashionable.
Materials:
- Fabric of your choice
- Clamps
- Staple gun
Process:
If your valances are made of two boxes, use a staple remover to separate the two pieces. Assess if the fabric needs to be removed or if it is thin enough to recover. Place fabric underneath the valance and cut fabric to fit, leaving a few extra inches on each side.
Start with the valance front-side down and staple the fabric over the top. Continue stapling fabric in small sections, using clamps as needed. Fold the fabric as if wrapping a gift box to create smooth corners.
See our step-by-step RV valance makeover guide for more details.
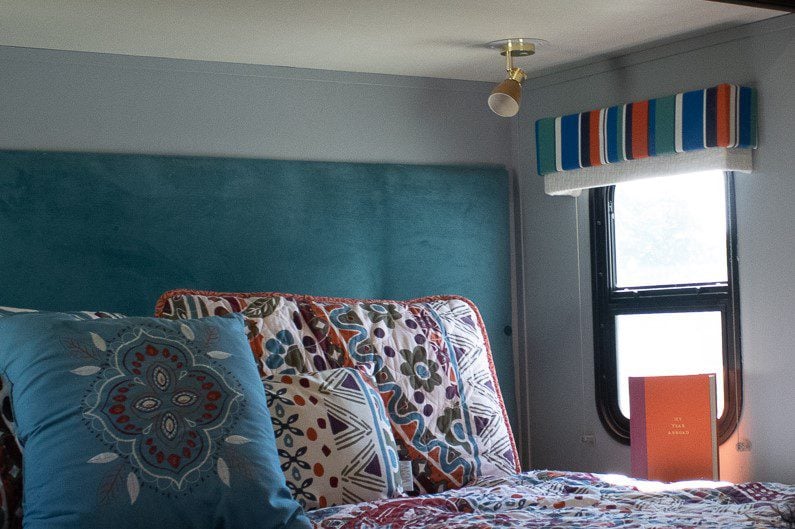
Replace Light Fixtures
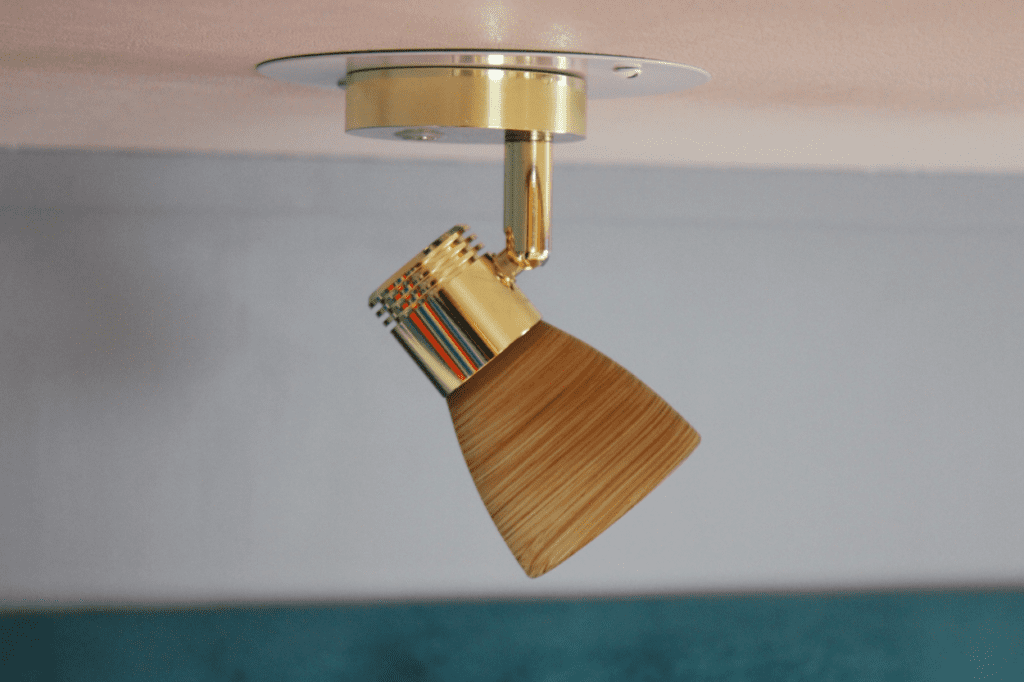
New light fixtures are a great way to add a little more pizzazz to your RV master bedroom remodel. We replaced the reading lights over our bed and the new lights are my absolute favorite part of our new bedroom.
Materials:
- New fixture (We bought these 12v Modern Glass Reading Lights)
- Wire connectors
Process:
When purchasing a light fixture, make sure the bulb matches the voltage of your original fixture (either 12v or 120v). Also, make sure the new light fixture turns on the same way as the old one (wall switch or switch on the fixture).
See our list of 17 modern 12v light fixtures to select the best lamp for your renovation.
Installing a light in an RV is similar to installing any house fixture. If you are not familiar with electricity and wiring, hire an electrician to complete this job.
If you install the lights yourself, turn off the power before removing the original fixture and leave it off while installing the new one. Use new wire connectors; do not try to reuse the old ones.
Also, make sure to take a picture of the original wiring so you can compare it when installing the new light.
Unfortunately, our new light fixtures had a smaller profile than the holes from the old lights. We remedied this by buying cover plates, drilling a hole in them for the wires, and installing them under the fixture.
You can see the plate in the above picture, but it is not visible when standing up in our bedroom.
Buy New Bedding

Finally, if you want to make a big change without doing any work, just buy a new bed set. Bungalow Rose makes great quilt sets that are colorful, affordable, and the perfect weight for warm-weather RV camping.
See the rest of our RV renovation in our article, 11 Simple RV Remodel Ideas.
Happy Camping!
Christina Pate is a seasoned full-time RVer who, along with her husband Justin, has journeyed across the US, Canada, and Mexico. Drawing from her extensive travels, RV repairs and RV renovations, she founded Travels with Ted to guide and inspire fellow RV enthusiasts. Christina is also the co-author of The Owner’s Guide to RV Maintenance and the creator of My RV Log Book.