
This post may contain affiliate links. See our affiliate disclaimer here.
Understanding basic RV maintenance is a key skill every camper should learn. Many costly RV repairs can be prevented by completing routine servicing of RV components. Campers need to clean their RV water heaters at least once a year to prevent build-up. In this guide, we detail exactly how to clean your RV water heater.
The instructions for cleaning your RV water heater vary by brand, so please determine if you have an Atwood or Suburban model before proceeding.
How to Clean Your Atwood RV Water Heater
Tools Required
Cleaning your RV water heater is a fairly simple task, but there are a few required tools.
- Water Heater Tank Rinser
- Air Compressor (You can use the same compressor for your RV tires)
Step 1: Turn the Power Off
Before cleaning your RV water heater, turn it off and allow enough time for the water to cool. Then, test the hot water from an indoor tap to verify that the water in the tank is no longer hot.
After the water has cooled, turn off any water flowing into the RV tanks. To ensure the water heater cannot turn on while you are performing work, turn off all power sources. Unplug your electric power, turn off your battery, and shut off your propane.
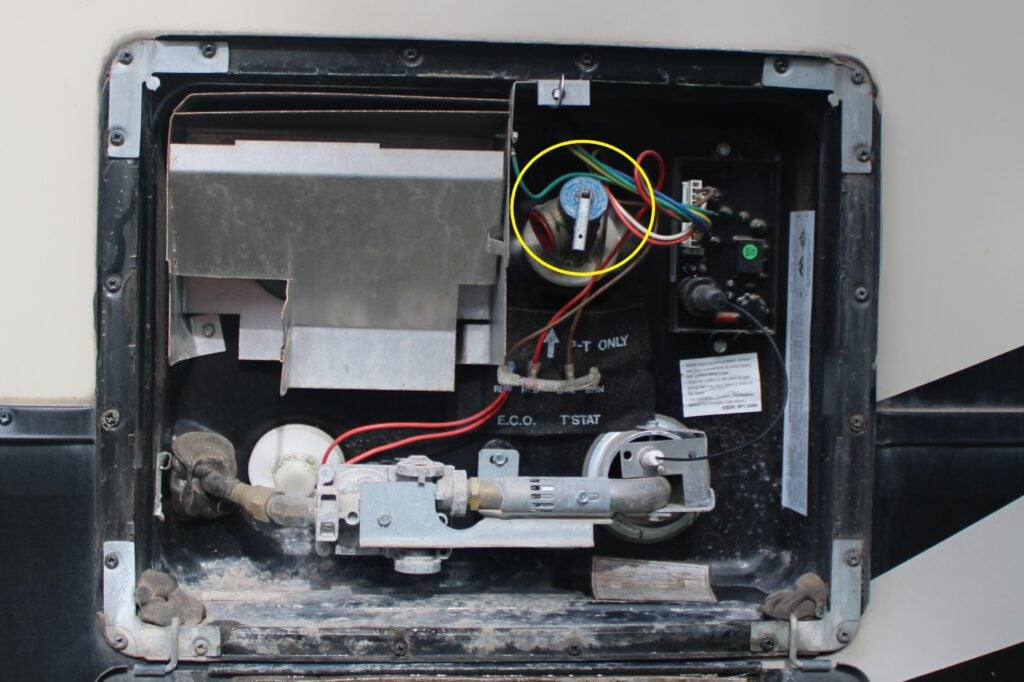
Step 2: Relieve Pressure
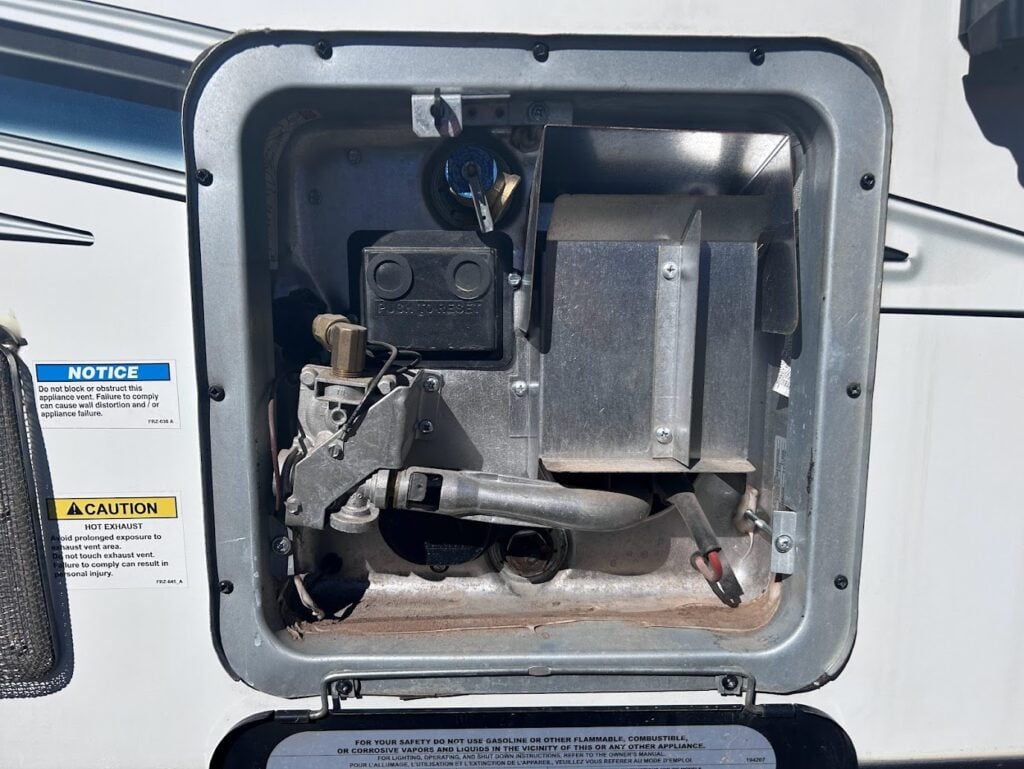
Next, locate and open the water heater access on the outside of your RV. Flip up the lever on your pressure relief valve to remove any pressure from the water heater. I have circled the pressure relief valve in the below image.
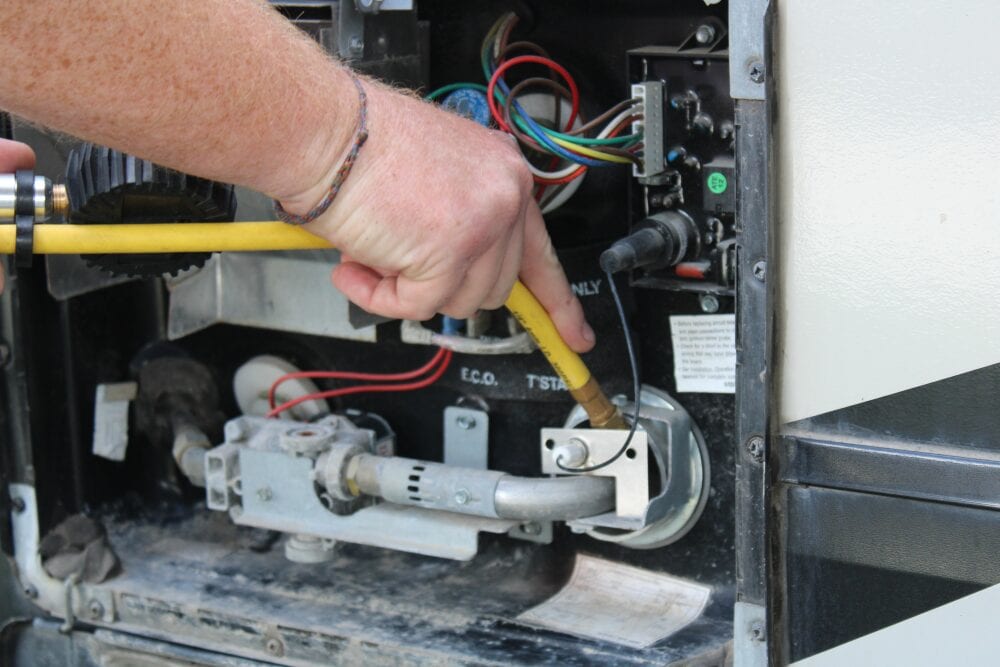
Step 3: Clear Debris
Then use an air compressor to remove debris from the burner tube and the burner chamber. The burner chamber is where the air hose is inserted in the below image. The burner tube is the metal tube connected to the chamber.
Simply, blow compressed air for a minute or two into these areas to clean debris from your RV water heater.
Step 4: Drain Water Heater
Loosen the plug using a 7/8-inch socket or wrench, until it is hand tight. Use one hand to lift the pressure relief valve, and finish removing the plug with your other hand. Allow the water heater to fully drain.
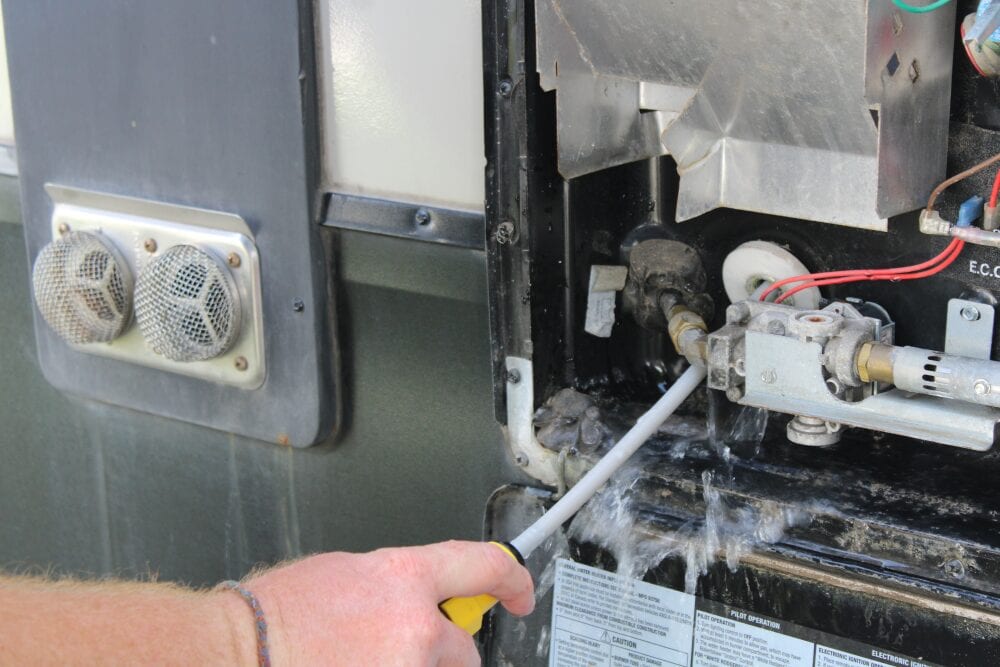
Step 5: Flush the RV Water Heater
Next, connect the rinsing tool to a garden hose. Put the wand into the hole where the plug was removed. Moving the tool around, run water into the water heater for a few minutes. Turn off the hose, and allow any water to fully drain out.
Step 6: Replace the Plug
Once the water heater has fully drained, reinstall the plug. Place the plug back in and use your hand or a wrench to tighten it in place. Then, flip the pressure relief lever back down.
Step 7: Clean the RV Water Heater
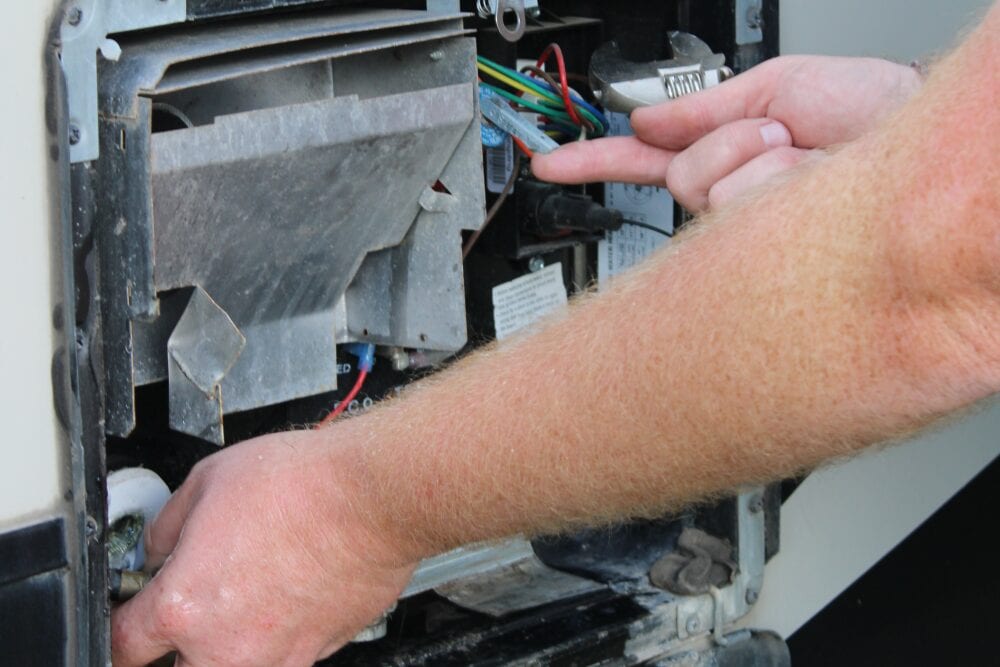
Finally, use an all-purpose cleaner and a clean rag to wipe down all the components of your RV water heater. Just spray the rag and clean the water heater avoiding electrical wires. Now your annual RV water heater service is complete!
How to Clean Your Suburban RV Water Heater
Tools Required
Cleaning your RV water heater is a fairly simple task, but there are a few required tools.
Step 1: Turn the Power Off
Before cleaning your RV water heater, turn it off and allow enough time for the water to cool. Then, test the hot water from an indoor tap to verify that the water in the tank is no longer hot.
After the water has cooled, turn off any water flowing into the RV tanks. To ensure the water heater cannot turn on while you are performing work, turn off all power sources. Unplug your electric power, turn off your battery, and shut off your propane.
Step 2: Relieve Pressure
Next, locate and open the water heater access on the outside of your RV. Flip up the lever on your pressure relief valve to remove any pressure from the water heater. I have circled the pressure relief valve in the below image.

Step 3: Clear Debris
Then use an air compressor to remove debris from the burner tube and the burner chamber. The burner chamber is where the air hose is inserted in the below image. The burner tune is the metal tube connected to the chamber.
Simply, blow compressed air for a minute or two into these areas to clean debris from your RV water heater.
Step 4: Drain Water Heater
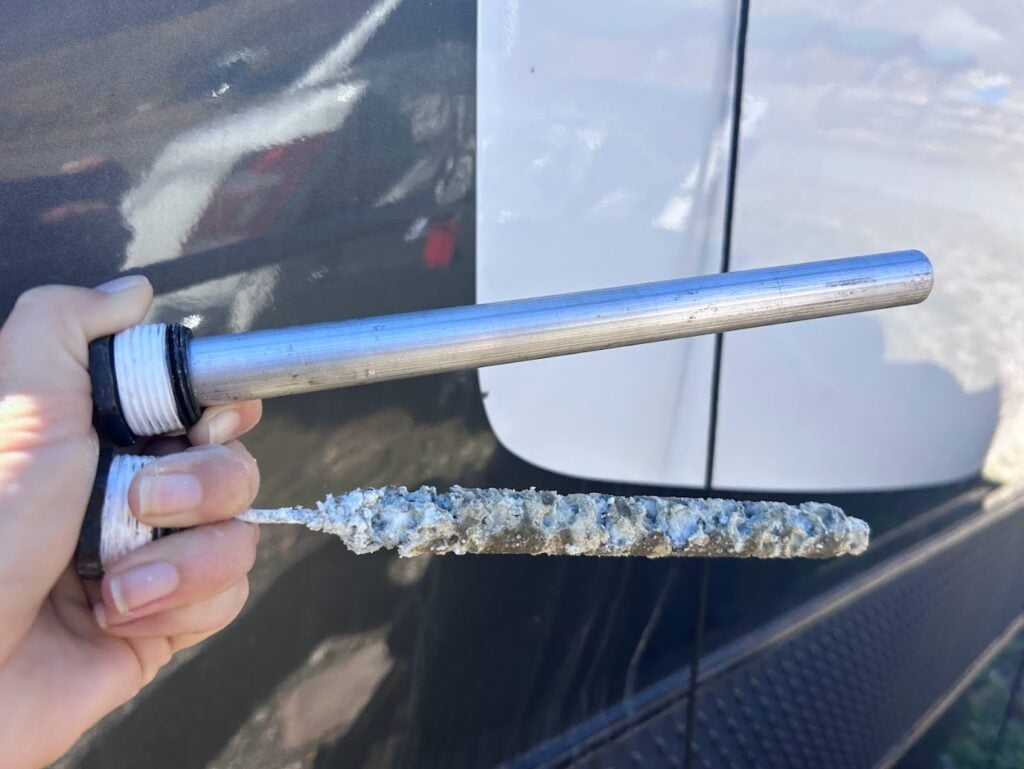
Anode rods on Suburban RV water heaters should be replaced during the maintenance process. Using a 1-1/16 inch socket loosen the anode rod until it is hand tight.
Then, lift the pressure relief valve and finish removing the anode rod with your other hand. Allow the water heater to fully drain.
Step 5: Flush the RV Water Heater
Next, connect the rinsing tool to a garden hose. Put the wand into the hole where the anode rod was removed. Moving the tool around, run water into the water heater for a few minutes. Turn off the hose, and allow any water to fully drain out.
Step 6: Replace the Anode Rod
Once the water heater has fully drained, insert the new anode rod. Slide in the new anode rod, screw it hand tight, and secure it with the socket. Then, flip the pressure relief lever back down.
Step 7: Clean the RV Water Heater
Finally, use an all-purpose cleaner and a clean rag to wipe down all the components of your RV water heater. Just spray the rag and clean the water heater avoiding electrical wires. Now your annual RV water heater service is complete!
Frequently Asked Questions
How often should an RV water heater be cleaned?
RV water heaters require annual cleaning and servicing. Clean and drain your RV water heater and the end of every camping season before winterizing your RV. For Suburban water heaters, the anode rod should also be replaced annually.
How do you fill an RV water heater?
RV water heaters are automatically filled when you fill-up the fresh water tank or connect to city water. If your hot water tank is not filling, make sure your hot water bypass is not turned on.
Should I leave my RV water heater turned on?
RV water heaters can be left on as long as there is water in the tank. Fill your fresh water tank or turn on your city water connection and allow water to run through the faucets for a few minutes before turning the water heater on.
Thanks for reading our guide to RV water heater maintenance. If you are currently having issues with your appliance, check out our RV water heater troubleshooting guide.
After following the above instructions, your RV water heater will be in tip-top shape, but what about the rest of your RV?
We have several maintenance guides to help you prevent issues with your RV appliances and components.
- To learn more about maintaining your RV tanks, check out our beginner’s guide to RV holding tanks.
- Clean your RV Air Conditioning Units at the same time as your water heater
- See our RV maintenance checklist for a full list of important annual tasks
Happy Camping!
Christina Pate is a seasoned full-time RVer who, along with her husband Justin, has journeyed across the US, Canada, and Mexico. Drawing from her extensive travels, RV repairs and RV renovations, she founded Travels with Ted to guide and inspire fellow RV enthusiasts. Christina is also the co-author of The Owner’s Guide to RV Maintenance and the creator of My RV Log Book.