This post may contain affiliate links. See our affiliate disclaimer here.
Emptying and cleaning RV holding tanks is one of the least pleasant parts of RV camping. The task is even more annoying when campers must move their RV or wait in line for a dump station.
So, that raises the question: can you just empty your tanks at home? The short answer is yes, but there are several factors to consider before turning your driveway into a dump station. Below is a step by step guide on how to dump your RV tanks at home.
Contents
- 1 RV Holding Tank Overview
- 2 Considerations when Dumping RV Tanks at Home
- 3 How to Dump your RV Tanks at Home: Option 1
- 4 How to Dump your RV Tanks at Home: Option 2
- 5 How to Dump your RV Tanks at Home: Option 3
- 6 Emptying a Fresh Water Tank at Home
- 7 How to Find an RV Dump Station
- 8 RV Dumping Tools and Equipment
- 9 How Not to Dump RV Tanks at Home: The Bucket Method
- 10 FAQs about Dumping RV Tanks at Home
RV Holding Tank Overview
For new RVers, we will start with an overview of what RV holding tanks are and what they contain. If you already know the basics, you can skip ahead to the next section. All motorhome RVs, fifth wheels and travel trailers have three types of RV holding tanks. The three types are fresh water, gray water and black water.

Fresh Water Tanks
The fresh water tank holds potable water for use in an RV camper. Water from the fresh water tank is pumped up into the RV for the sinks and shower. The fresh water tank only needs to be filled when an RV is not connected to city or campground water.
If the fresh water tank becomes contaminated by bad or foreign water, sanitize the tank before drinking water from the RV faucets.
Gray Water Tanks
The gray water tanks store used fresh water. Any water that drains through the shower or kitchen and bathroom sinks collects in the gray water tanks. Many larger RVs have separate gray water tanks for the kitchen and bathroom.
Although water in the gray tank used to be fresh, it should not be considered clean or safe for the environment any longer. The gray tank contains soapy water and food particles. Water in the gray tank should always be treated as waste water.
Black Water Tanks
The black water tank is where everything that goes into the RV toilet is stored. Only human waste and RV friendly toilet paper are appropriate to flush into the black tank. Other paper products will clog up the black tank and create a giant mess.
The black tank valve should never be left open. Leave the black tank closed until you are ready to start dumping the close to full tank.
Considerations when Dumping RV Tanks at Home
As you will see, it is easy to learn how to dump your RV tanks at home. However, there are some factors to consider before deciding if you actually want to dump your RV at your home.
Legality of Dumping RV Tanks at Home
Before emptying your RV’s holding tanks, it is important to check local laws and regulations. In most areas, it is legal to empty RV tanks into your own private septic system.
However, some cities and municipalities have regulations that restrict or prohibit emptying RV waste water at private residences. All RV owners should thoroughly review homeowner association rules and local ordinances before dumping black or gray waste at their residence.
While it is often legal to dump your RV tanks at home, it is never safe or legal to dump waste from RV tanks on the ground. RV black tanks contain raw sewage that needs to be properly disposed of through a septic tank, dump station or municipal sewer system.
Gray tanks also contain soap and other chemicals that are not safe to pour out in the open. If emptying RV tanks is allowed at your residence, use one of the below methods to drain tanks properly.
RV Tank Chemicals
We typically recommend adding chemicals to your RV’s black water tank after it is emptied. However, the EPA warns that the chemicals found in these tank treatments and deodorizers may contaminate soil and ground water or cause damage to septic systems.
Select a tank treatment that is biodegradable and does not contain any of the chemicals listed in the EPA guide. Camco sells a citrus scented tank treatment that is 100% biodegradable and does not contain any of the problematic chemicals.
Distance from the Campground
RVers looking to dump their tanks at home to avoid the dump station lines, should consider if there are long distances between their campsites and home. If your black and gray tanks are close to full, they are going to weigh a ton.
To be exact, a gallon of water weighs 8.33 pounds, so a full 40 gallon gray water tank will weigh over 300 pounds. Driving or towing an over weighted RV can be dangerous.
Even if the RV is within weight recommendations, the added weight will make the ride less smooth and impact fuel efficiency. See our RV gas cost calculator for more tips on getting better gas mileage.
How to Dump your RV Tanks at Home: Option 1
The easiest and best way to dump your RV tanks at home is to dump the waste from your RV directly into your septic tank or sewer system. Follow the below steps to empty your RV gray and black tanks at your residence.

Step 1: Locate the Cleanout
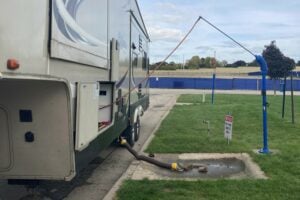
Most homes have a cleanout stub that serves as an access point for the septic system or municipal sewer system. Walk around your home until you locate a cleanout stub like the one pictured above.
These access points can be located anywhere between your home and septic tank or city sewer lines. Some stubs are covered in dirt or grass, so keep searching if you do not find it on the first walk around.
The cleanout that connects to your septic system or municipal sewer line is the only safe place to empty water. Do not empty gray or black water tanks into a storm drain or other openings.
Step 2: Connect the RV Sewer Hose to the Cleanout
Connect the sewer hose to your RV and the cleanout stub in the same way you would at a full hook-up RV park or dump station. If you are not able to park your RV close enough for your sewer hose to reach the cleanout, an extension hose can be purchased.
There are a few additional pieces of equipment needed to ensure that the waste is emptied properly from the RV into the residential sewer system without spills.
Sewer hoses should be placed on supports so they run downhill. An elbow connector should also be used to securely connect the hose to the cleanout.
Step 3: Empty the Holding Tanks
Empty the holding tanks one at a time, by pulling the tank valves open. Always empty the black tank first, so the gray water can help clean out any solid waste stuck in the sewer hose. Also, take care to pull the black and gray tank valve handles straight out as twisting can damage the connected cables.
Using a garden hose specially designated for RV sewer flushing, fill up your black tank with water from any faucet on the outside of your house. Depending on the distance between your faucets and the cleanout, you may need an extra long hose.
Once the black tank is full (typically takes 5 to 10 minutes), pull the valve to empty the black tank again. Repeat the flushing process until the water emptying out of the tank is clear and free of debris.
For more detailed instructions on the draining and flushing process, see our beginner’s guide to RV holding tanks.
Step 4: Safely Store All Gear
Wearing gloves carefully remove the elbow connector and sewer hose from the cleanout and place it in a designated storage bin. Close the gate valve connected to your RV before removing the sewer hose.
Having an extra gate valve will help prevent any disgusting spills. Don’t forget to put the lid back on the cleanout access point.
Summary
Dumping your RV tanks at home is basically the same process as dumping your RV tanks anywhere. As with any dump station, setting up your hose correctly and flushing thoroughly are key to keeping your tanks in good shape.
If you are emptying tanks after returning from a camping trip, dump them the same day so odorous human waste does not sit in the RV for a prolonged period.
How to Dump your RV Tanks at Home: Option 2
If you cannot park your RV close enough to the cleanout stub to empty your tanks, there is another option. Emptying RV tank contents into a portable waste holding tank instead of directly into the sewer system is the other solution for at home dumping.
Many RV blogs also offer the bucket method, where waste water is emptied directly into a plain old bucket, as a dumping option. However, I highly advise against that option which has a high likelihood of splashes and spills (EW!). A container specifically designed to collect waste is safer and much more sanitary.
Step 1: Select the Proper Tank
Before you can start dumping, you need to buy the portable waste holding tank. Before buying, reference your owner’s manual to determine the capacity of your RV’s black and gray water tanks.
Ideally your portable tank or waste tote should have the same capacity as your largest holding tank. If the portable tank is smaller than your black or gray tanks, always dump before your tanks are full.
Step 2: Connect the RV Sewer Hose to the Portable Tank
Connect the sewer hose to the RV and the drain valve on the portable tank. Use sewer hose supports to ensure the waste will flow in the direction gravity intended. Also use an elbow connector for a secure connection to the portable tank.
Keep the sewage hose as short as possible, as having the hose fully extended makes it more difficult to determine when to stop dumping to prevent an overflow.
Step 3: Empty the Black Tank
Pull the black tank valve handle to open the black tank and allow it to empty. Stay close by while the black tank is emptying. If the portable tote is smaller than your black tank, close the black tank valve when you expect the tote is three-fourths of the way full.
Closing the black tank before the tote is full will allow all of the waste to drain from the hose without overfilling the tote. After dumping, transport your portable tank to your sewer cleanout or a local dump station.
Connect a sewer hose to the tote’s dump valve and the dump station and open the vent to empty the waste. If you are using a smaller tote, repeat the above process until your black tank is empty
Step 4: Empty the Gray Tank
Drain the gray tanks following the exact same process used to empty the black tanks. Always empty the gray tank(s) after the black tank to help clean the portable waste tank. Repeat the dumping process until all gray tanks are empty.
Step 5: Clean the Portable Waste Tank
Fill the tote with fresh water from your outside faucet or the local dump station. Then, empty the portable tank following the same process used to empty the waste and gray water from it. Repeat the process until the water being emptied from the waste tote is completely clear.
Summary
Using a portable waste tank or tote is a great option to sporadically dump RV holding tanks at home. However, a tote should never be a long-term solution for emptying RV tanks.
When using a portable tank, it would require several trips to the sump station or cleanout to properly flush your tanks. Use the the tote only when guests are staying in the RV and it is inconvenient to move.
The next time the RV is drained at a dump station, properly flush and clean the black tank.
How to Dump your RV Tanks at Home: Option 3
Good news: If you are unable or unwilling to dump your RV tanks at home, there is still a solution that does not involve moving the RV. Hire a local RV honey wagon to come empty your tanks for you. If your RV is permanently parked at your home, and you are not close to the cleanout, a honey wagon service is likely the best option.
To find a honey wagon service, search for ” RV tank pumping service near me” or “septic tank pumping service near me”. Not all septic tank service companies will dump RVs, but many do offer the service. If you have trouble locating a provider online, call local campgrounds to request a recommendation.
When using a honey wagon service to dump your RV at home, there are a few considerations. Firstly, tank pumping services will need to be scheduled in advance, so water usage in the RV will need to be managed carefully.
Check the tank sensors often and limit water consumption and bathroom usage to ensure the tanks are not full before the schedule dump day. Secondly, these services are most likely just going to empty the tanks without flushing them.
Plan to drive to a dump station or use your cleanout access after every few pumping services to properly flush and clean the black tank.
Emptying a Fresh Water Tank at Home
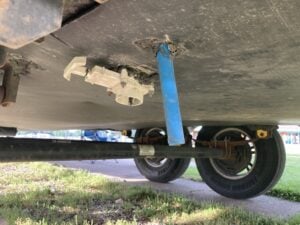
Fortunately, emptying a fresh water tank at home is much easier than draining the RV’s waste tanks. Since the fresh water tank should only contain clean water, it is safe to empty the tank on most lawns or driveways.
When emptying a fresh water tank at home, just make sure the RV is parked so water will not flow towards your house or other areas you prefer to keep dry. Most RVs have a low point drain located under the RV.
Check your owner’s manual for the exact location of your low point drain. Once the drain is located, simply open it and let the water flow out until the tank is empty. Ideally, all or most of the fresh water should be emptied before traveling so as to not add weight to the RV.
How to Find an RV Dump Station
If you cannot figure out how to dump your RV tanks at home or you need to empty a portable tank, you will need to find a local dump station.
The easiest way to locate a dump station near your home or route is to download the AllStays Camp & RV app. The app cost 10 dollars, but it is the most comprehensive listing of RV services in the United States. See our full list of must have apps for RV travel here.
Dump stations are located a variety of businesses including campgrounds, RV parks, state parks, gas stations, truck stops and rest areas. Most dump stations charge somewhere between 5 and 15 dollars per visit.
RV Dumping Tools and Equipment
Properly draining and cleaning black and gray water tanks requires several pieces of specialized equipment. Below is a complete list of everything you need to properly maintain your RV’s holding tanks. Click here to see the full list of required RV sewer supplies on Amazon.
- Sewer Hose: The hose is how waste securely flows from the RV into a dump station or septic tank. Look for longer hoses, such as this 20 foot Camco hose. RV sewer hoses can always be compressed when dump stations are close.
- Sewer Hose Extension: If your cleanout is a long distance from where you park your RV, a sewer hose extension may be needed. Purchase the extension and the main hose from the same brand to ensure they will fit properly.
- Sewer Hose Supports: Sewer hose supports help RV waste water drain more efficiently. When a sewer hose sits flat on the ground, clogs are inevitable. Never dump an RV tank without ensuring the sewer hose flows down from the RV to the waste outlet.
- Reverse Flush Valve with Gate: A reverse flush valve is the best tool to unplug clogs and flush out waste stuck in the bottom of the tank. Buying a flush valve with a built-in gate provides extra protection against drips and leaks.
- Elbow Connector: An elbow connector is a L-shaped attachment that connects to the end of an RV sewer hose. The connector ensures a secure fit into the dump station, so no waste water leaks out.
- Tank Treatment: RV black tank treatments help reduce odors and break up solid waste and toilet paper. AS noted in the beginning of the article, follow EPA guidelines for tank treatment when dumping RV tanks at home.
- Gloves: All RV owners should wear gloves when handling RV sewer accessories. The hoses and other items have come in direct contact with raw sewage, so handling these items with bare hands is disgusting.
- Flush Hose: RV owners should also have a garden hose that is only used for flushing and cleaning the black water tank. Never connect your drinking water hose to the RV’s sewer system.
- Lubricant Spray: The grey and black water tank valve handles also need regular maintenance. Every month after dumping the tanks (i.e. when the tanks are empty), RV owners should spray lubricant on these handles. After spraying the handles, pull them in and out a few times. A dry lubricant with Teflon is best.
How Not to Dump RV Tanks at Home: The Bucket Method
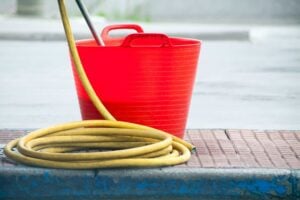
Many articles on the subject of dumping RVs at home recommend the bucket method, where waste is simply emptied into a bucket and then dumped into a toilet or cleanout. However, we strongly advise against using this method.
As detailed in our second option for dumping tanks at home, portable holding tanks are available on the market. These portable waste tanks are made to securely and safely hold human waste. Using a bucket, campers risk unsanitary spills and overflows.
FAQs about Dumping RV Tanks at Home
Can you empty RV holding tanks at home?
Fresh water RV tanks can be emptied anywhere as long as the water has not be contaminated. Gray and black water RV holding tanks can only be emptied at home if you have an accessible sewer cleanout.
Is it legal to dump RV tanks at home?
Generally, it is legal to dump RV tanks into your own septic tank or sewer system. However, local regulations may prohibit dumping RVs in certain areas.
If you’ve made it this far, you are officially an expert on how to dump your RV tanks at home! Whichever method of draining your tanks that you utilize, make safety and sanitation your top priority. Properly cleaning and maintaining waste water tanks is not the most exciting part of RVing, but draining them correctly the first time will help prevent major issues.
For more RV camping and maintenance tips, head over to our RV travel blog for more detailed how to guides and destination planners.
Where is your next adventure or RV road trip taking you? Share your plans with us in the comments section below.

Christina Pate is a seasoned full-time RVer who, along with her husband Justin, has journeyed across the US, Canada, and Mexico. Drawing from her extensive travels, RV repairs and RV renovations, she founded Travels with Ted to guide and inspire fellow RV enthusiasts. Christina is also the co-author of The Owner’s Guide to RV Maintenance and the creator of My RV Log Book.

